vision
Main objectives
- Document the EcoFlow Stream Ultra setup.
- Document the Shelly 3EM Pro installation in the electricity closet.
- Document the Smart EVSE DIY work in the garage.
- Document the balcony solar panel work.
- Tie the pieces together into one home energy and charging story.
Design requirements
- Where it makes sense - DIY!
- Fill the unused balcony space with panels.
- Make sure no energy is returned to the grid.
- Replace Schuko plug portable charger with 3-phase wallbox charger
- Scheduled car charging.
Goals that define basic success
- [x] Start harvesting solar energy.
- [x] Store the surplus in a battery and use it when the household needs it.
- [x] Install Shelly 3em pro to monitor household power usage.
- [x] Install wallbox 3 phase charging over Type-2 instead of 1-phase Schuko plug.
- [x] Automate car charging during off-peak hours
End goal of (un)achievable completion
- [x] Panel placement that accounts for maximum energy production i.e. rails, angles, etc.
- ⛔ Car charging on solar energy only.
the-story
Inspiration / Motivation
It started years ago, pretty much the next day we moved into our new house in a scorching sunny land. As we were still settling in, I had to move some cacti out of our way. I thought sunny balcony is exactly what they needed. I was wrong. Withing the first day, half of the cacti were 'boiled'. The other half only partially damaged. Then I realized that the only thing that can go there is solar panels. But any bigger work that wasn't hanging paintings was moved to the backlog as we had plenty on our plate.
Same happened a year ago. We got an EV. I thought - finally I can utilize the 3 phase output. I went shopping and a couple of hours into my research I gave up. Charging stations were coming with their proprietary cloud apps, home-assistant integration was poor or non existant and charging with 8A over 220V using Schuko plug through Shelly smart plug was good enough. So I gave up searching and moved this task to the backlog. Until one day I tried removing that plug and I realized that this constant 8A power drawing over the single phase socket isn't as good of a solution as I thought. Shelly plug contacts 'fused' with a wall socket. Contacts welded and plastic parts around - melted. I started searching online and I saw that it was a mistake to use a Shelly plug for EV charging. I learned it the hard way.
So I restarted my research. My goal was simple. The car should start/stop charging only on particular hours. Daily. Only thing I should do - plug in the charging cable. To my surprise, what I thought should be in every EV car app or charging station settings - it wasn't. My car's app would only allow to offset charging by some hours(one time) 🤯
Smart plugs that could handle such loads also seem to not exist.
But as I was starting to get anxious(again) about the pricy wallbox chargers with their cloud applications I found one product - Smart EVSE. Looking further into it I was hooked! It was exactly what I was looking for and more! More on it later.
In the meantime, my partner during one of our morning standups mentioned that she saw plug-and-play solar panel solutions with integrated inverters that the only thing you need to do is - plug into your wall socket. And there it was, a beautiful entrance of a rabbit hole that I went head down.
In short - what was a task to replace a breaking Smart plug became 2 big projects: DIY charging station and balcony solar panel setup.
Shopping List
Measurement
- Shelly 3EM Pro with 3x CT clamps(120eu)
- Shelly 3EM Pro with 1x CT clamps(120eu)
Balcony solar panels
With a 400+ message thread on Slack eventually I settled on this:
- EcoFlow Stream Ultra with 4 PV inputs(total 2kW) and a 1.9kWh battery(~700eu).
- Locally available 465W solar panels. Mostly due to their dimensions. (3x90eu)
EV charging
- Smart EVSE components (~320eu)
- Type-2 plug (~50eu)
- 5x 2.5mm2 wires (P1,P2,P3,N,PE)
- channels to hide the cables
The Process / Pr(👹)ss
These were 2 different tasks, but it made sense to work on them simultaineously.
ev-charging
Motivation
It's quite a simple list.
- Open source solution. I shouldn't need a yearly subscription or a 3rd party cloud service collecting my data to be able to schedule a car charge.
- When buying an appartment I had to walk an extra mile to get a 3 phase cable in our garage. Would be a waste not to use it.
- Native Home Assistant integration
- DIY!
- Price: ~3x cheaper.
Components
Following Smart EVSE diagram I ordered the following parts:
- DC Residual Current Sensor
- Iskra Contactor 32A 4pole 230V
- Iskra Contactor 32A 2pole 230V
- Smart EVSE v3.1 controller - Network connections : WiFi
- Enclosure IP65 with DIN rail They didn't have a connector on their store, so I bought one from AliExpress for 65eu
- Type-2 Female Socket 32A
With cables and housing total price was <400eu.
Garage work
Cable management
I had to make a decision, to put a charging station over the 3phase output. But then I would need a 12m cable. That is both expensive and not practical as we would be tripping over that cable all the time. Instead I chose to extend the cable in the channels along the wall. Nothing complex mostly just physical meticulous work getting these thick cables to go round the corners.
Smart EVSE assembly
This was a very pleasant task. Diagram very simple. Just wire everything as in the picture. Mounted all the parts in the enclosure. Only thing that required a bit of careful handcrafting was cutting a hole in the enclosure to fit in the Type-2 socket. I skipped some parts like locking mechanism or their sensorbox. At that time I thought I will be able to configure Smart EVSE to use data from my Shelly 3EM Pro. But later I learned it was not feasible. It's not a big deal for me as the panels do not produce enough power that I could use the charging station in solar mode.
Setup notes
- I connected both 4pole and 2pole contactors. To be able to switch between 1 phase and 3 phase charging.
- Connecting it to Home Assistant was also very simple:
- On Smart EVSE I configured my MQTT server.
- On Home Assistant I created a script:
- Set the current override to 8A
- Turn on 3 phase mode
- Put Smart EVSE into
Normalmode.
- On Home Assistant I created an automation:
- daily at 2:00am and at 11am trigger the script
- at 4am and at 3pm put Smart EVSE into
Offmode.
That was it. Every day the charging station is charging 3x8A 2am - 4am and 11am - 3pm. And the only thing I need to do is to not forget to plug the car. If electricity provider will change the cheap hour window I will adjust that. If I will decide to charge it on one phase or on less current - will adjust.
Lessons learned
I am happy that for once I had a project where I did not say - if I would do it again, I would do something differently.
balcony-solar
Motivation
- We have an all year round sunny roof balcony
- There exist plug-and-play balcony solar solutions
- Everyhing in our house is running on electricity. Even a car.
- Surplus energy should be stored in a battery rather than exported to the grid.
Simple math really, when you put these points together there's only one way forward...
Components
- EkoFlow STREAM Ultra 4pv 500W inputs with 1.92kWh battery
- 3x 465W Solar panels
- 2x Shelly 3EM Pro
- Wood for the frame
Installation notes
Physical installation
At the time of writing solar energy is not regulated. Because I did not want anyone knocking at my door I wanted Zero feed-in setup. Another constraint: In Greece even if I own the apartment, I do not own the outside walls. Because I did not want to spend my time figuring out what is allowed and what is not I wanted a setup that would not require drilling or in any way messing up with the apartments walls or balcony floor. I decided to build a wooden frame and mount the panels on it. EkoFlow STREAM ultra is rain/dust resistant so it went nicely under one of the panels. Set up was done.
Electric wiring
Electricity part was a little more complex. I reached out in a local community with my questions, I received loads of information. Long story short, for EcoFlow to know how much solar power it can push into the network, it needs to know the load of the phase it's connected to. I tried finding an electrician to install Shelly 3EM Pro in my electricity closet however while waiting for the response I started looking into my closet and saw that it's not that difficult of a task, so I decided to do it on my own. Figuring out wiring wasn't obvious because it's a 2 floor apartment with a garage. But eventually I did the following:
- Figured out the phases and mapped what appliances were connected where.
- I saw that EkoFlow was connecting to a socket on phase 1. So I changed the circuit feeding my 3d printer/server closet/and my office room devices to be on the same phace as the solar panels
- Made sure 1 phase EV charging was also using the same phase
Configuration
For EkoFlow to know how much electricity it can push to the household it needs to know the load of that one phase. So I installed Shelly that only has CT clamped on phase 1. But after I saw how useful was to see the precice load on all 3 phases, I bought and installed another one to be able to monitor my house consumption.
Setting up the Shellies was an easy task. As for EkoFlow, initial set up was super easy, however to fine tune it, I had to fiddle a little until I learned what meant what. Took me a couple of days until I was happy with how it was set up.
Lessons learned
The biggest disappointment in this project was learning how partial shade affect the charging rates. Somehow I didn't know that until was in the last phases of setting things up. Even 10-15% shade diagonally/vertically or horizontally would drop charging rates from 365W to 120-180W. This is especially big loss in a balcony that has less than 2h of full sun. I am confident my 3 panels are delivering 1/3 or 1/4 of it's max potential. During the summer months I am getting 3-4kWh per day. We will see how that will change now that the winter is coming. Also I had one accident, when a summer storm lifted one panel off the floor like it was a piece of paper. I was very lucky as it ended without casualties. I did not test my luck twice.
Conclusion
I learned a lot in the process. Luckily I had no major step backs and the whole process went mostly as I hoped it to go.
gallery
Pics or it didn't happen!
Smart EVSE installed
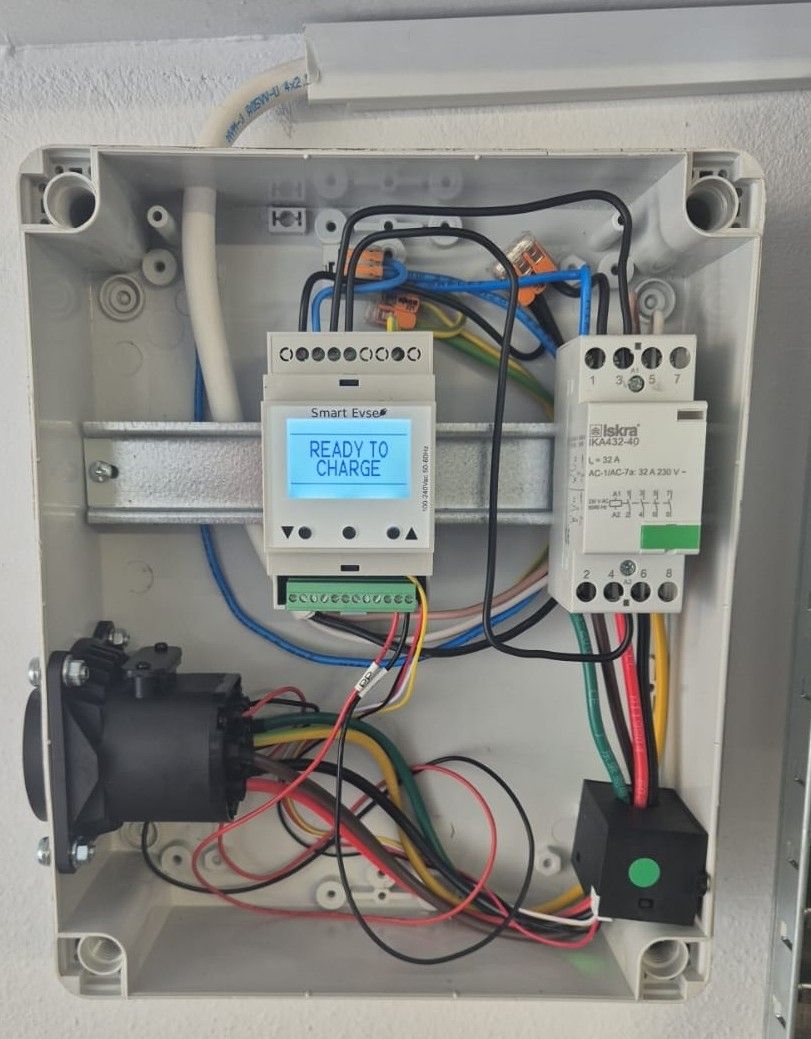 Wired and connected and ready to CHARGE!
Electricity closet
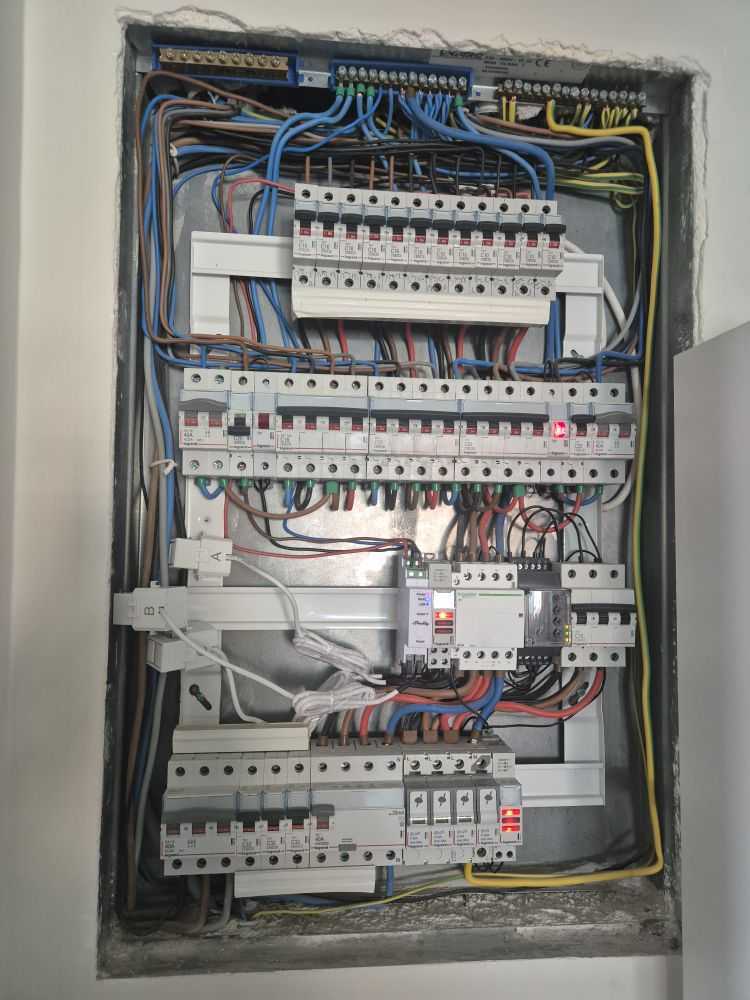 Electricians work... How hard can it be...
Panels
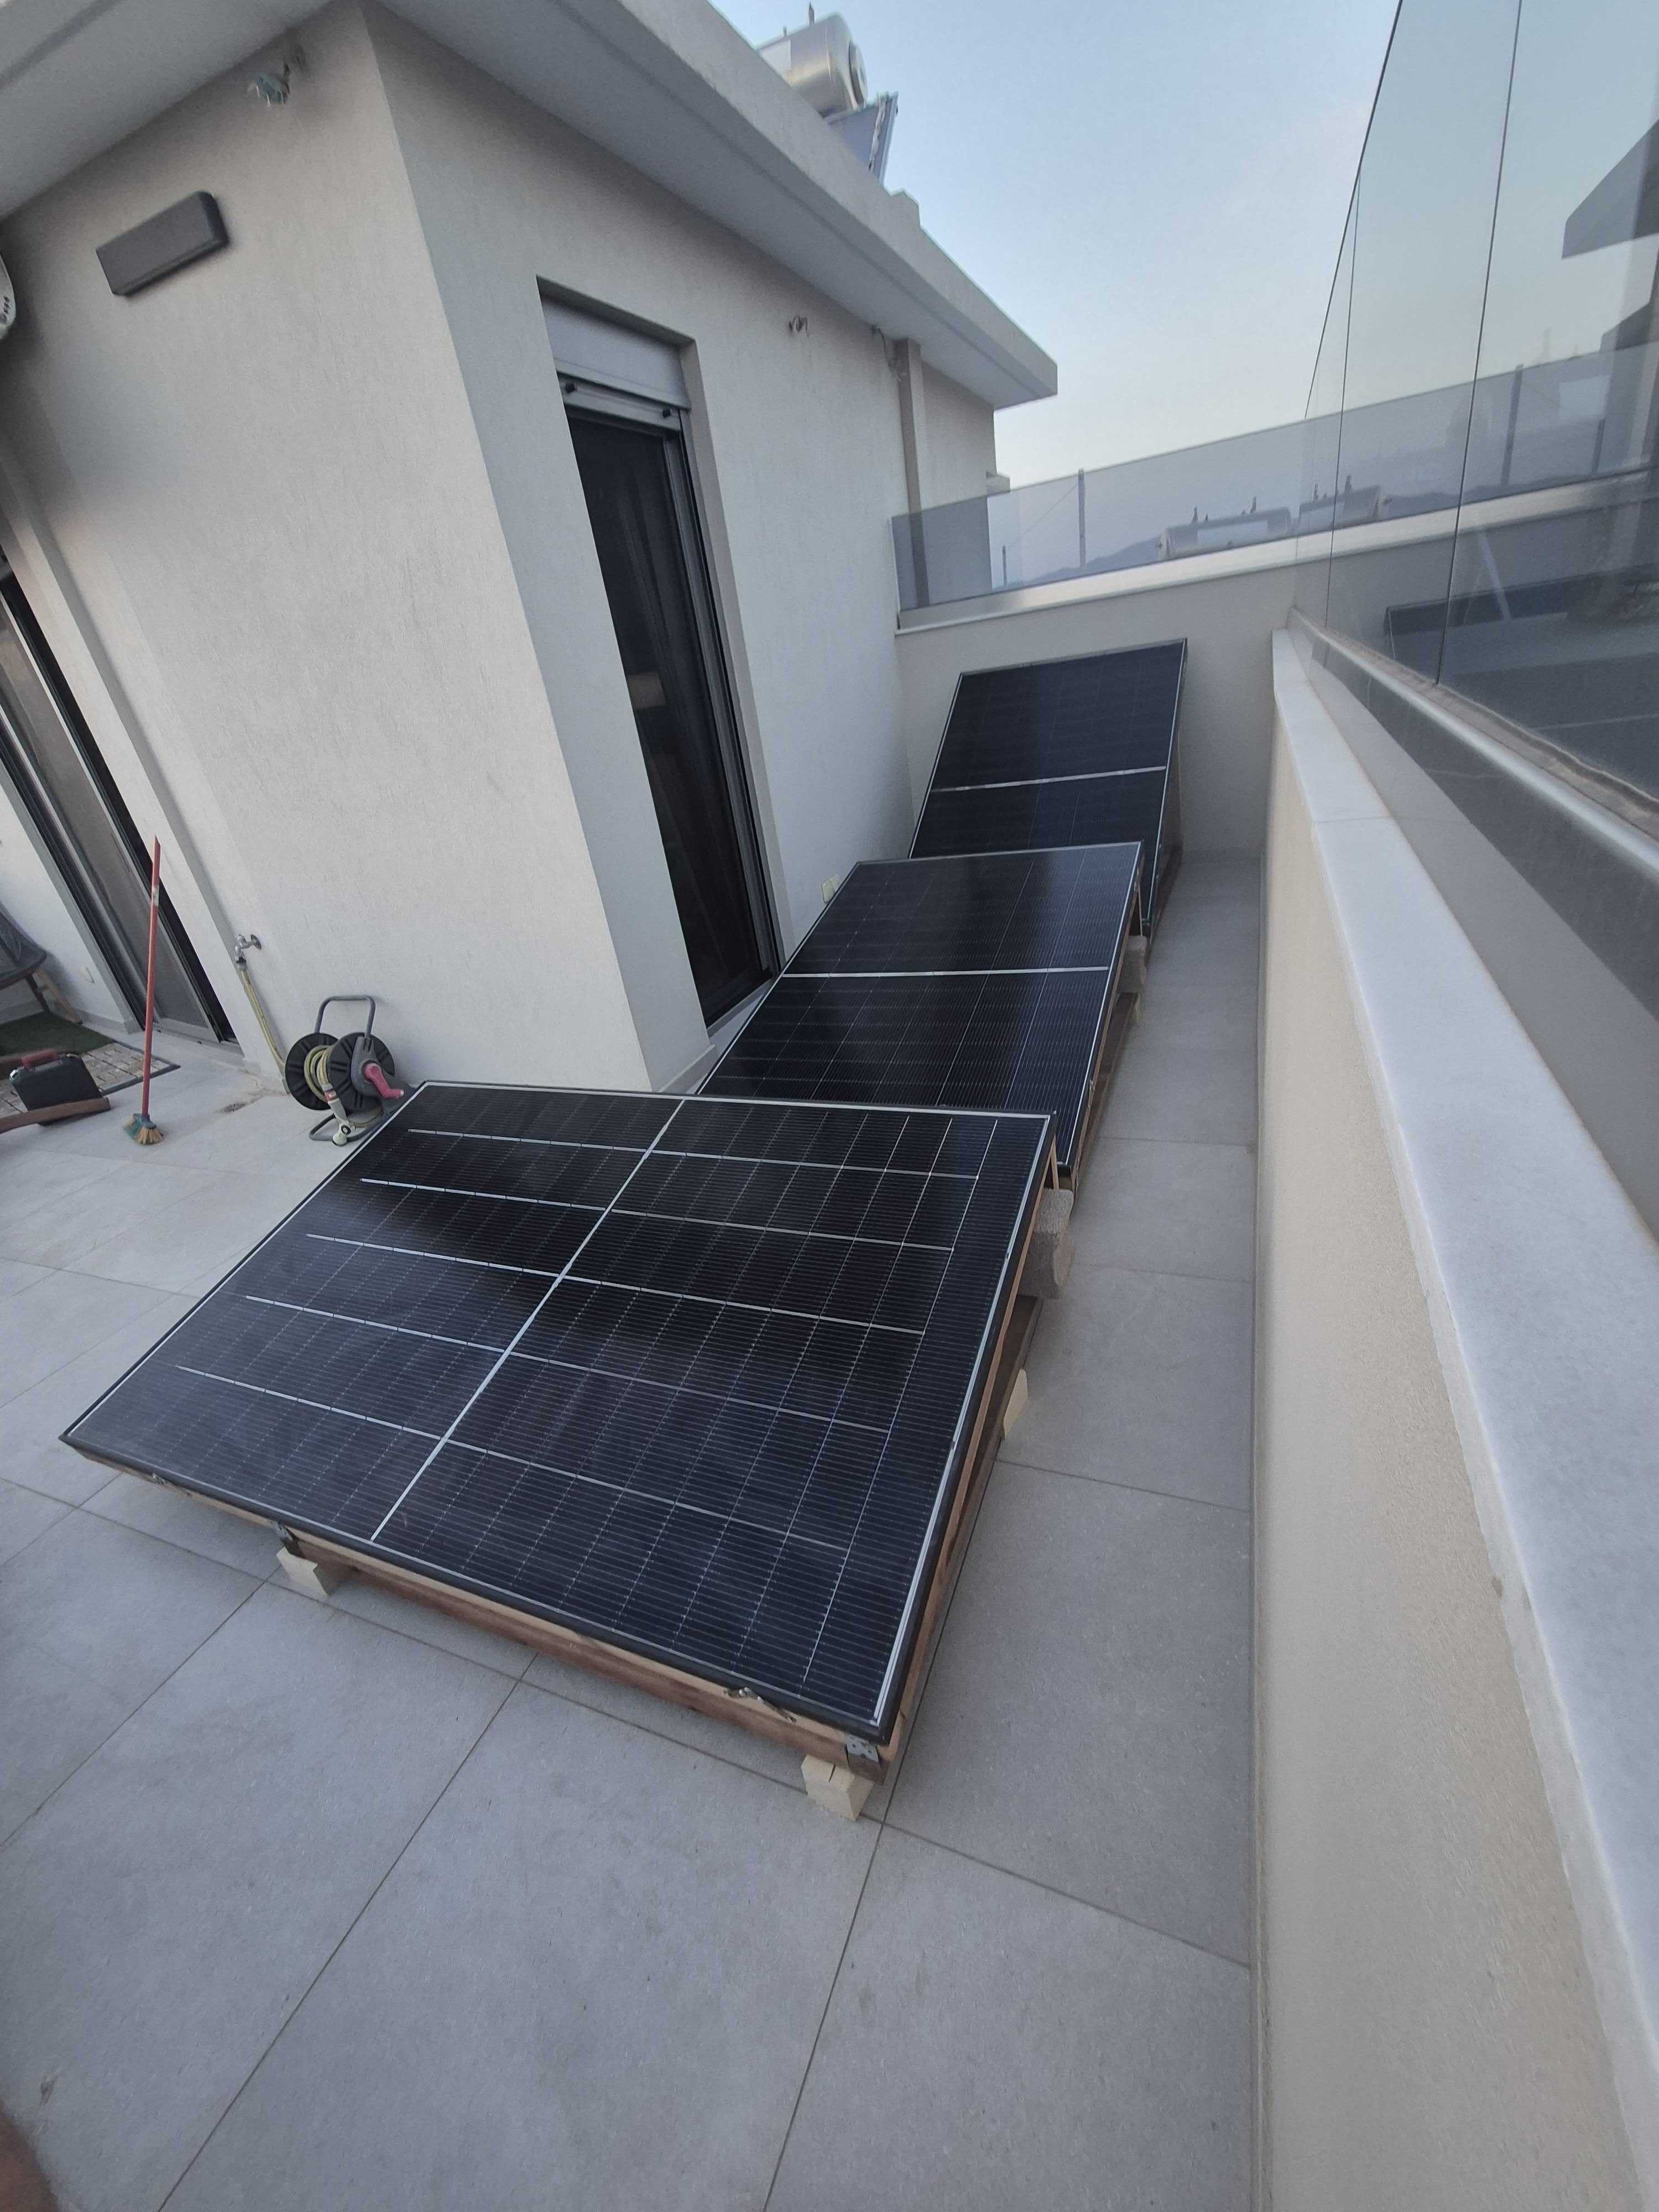 Placed and mounted!
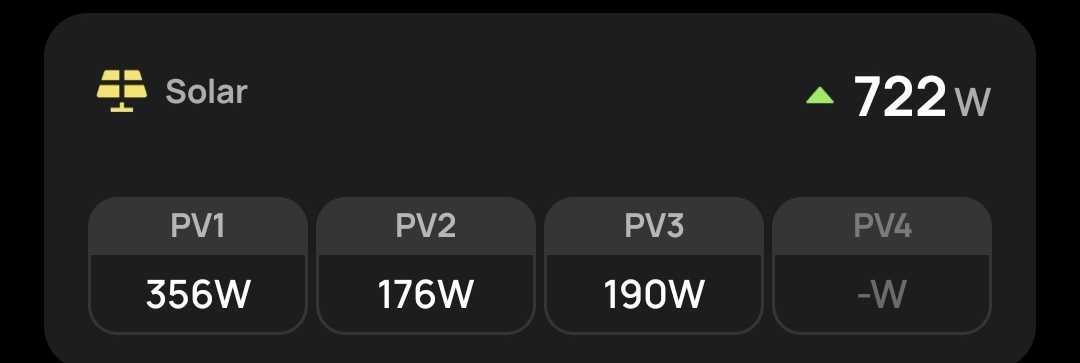 One panel in a full sun, while two are 10% shadowed
The storm
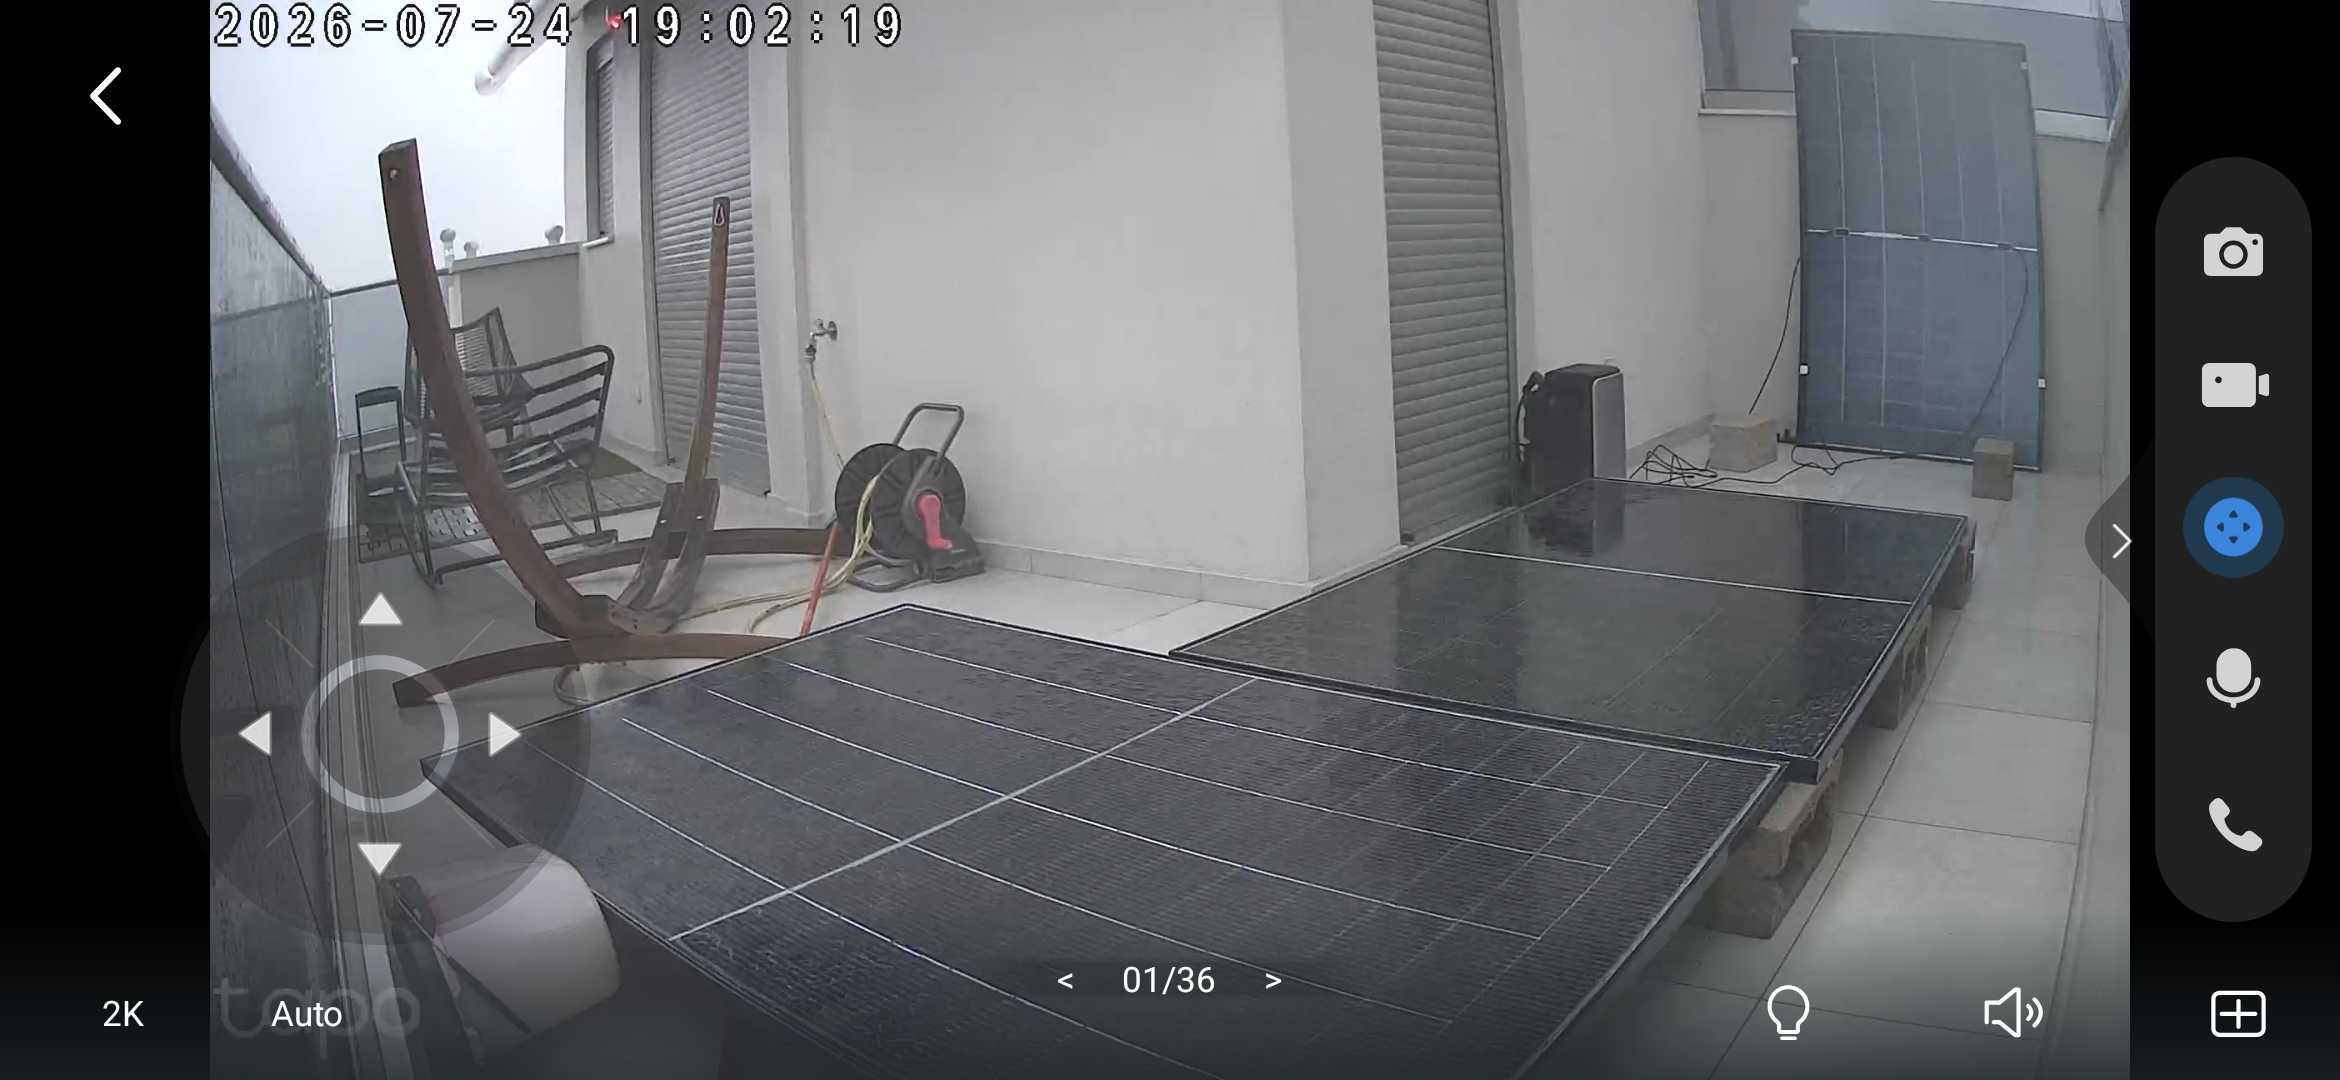 15min storm vs unmounted panel